For this project, I shall be explaining how I used a template and modified this to make this blog. Whilst not all templates are made in the same way, they do bear a lot of similarities and I am fairly confident that one can easily apply the lessons learned here to other projects.
I have chosen the template Herring Cove, by @Arnp. It is a rather good looking and simple template that is easy to modify.
Forking the Project
What is Forking?
A fork is a personal copy of another user’s repository (basically their project) that lives on your account. Forks allow you to freely make changes to a project without affecting the original.
From the GitHub Glossary
For our purposes, we shall be creating a personal copy of the Herring-Cove template, that we shall customize to suit our needs.
To Fork our Project, all we need to do is simply press the Fork button on the GitHub Page, by @Arnp

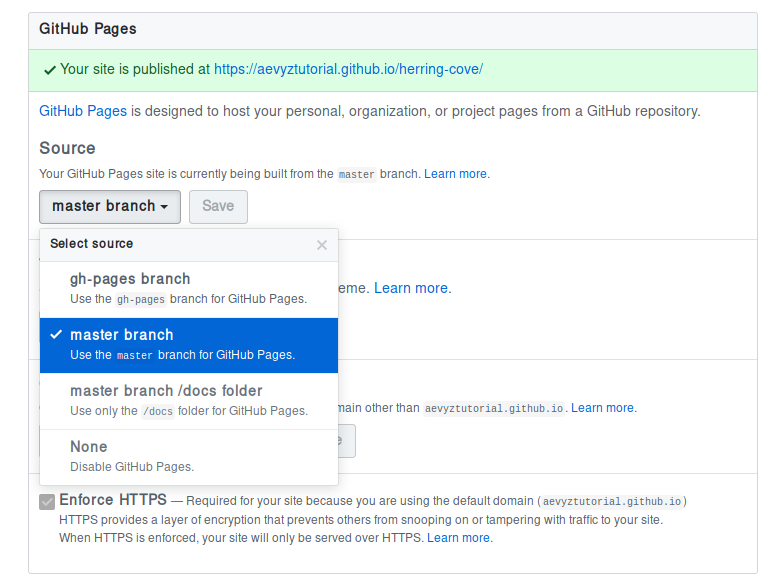
You will finally need to change the settings of your project, to allow your GitHub page to be live.
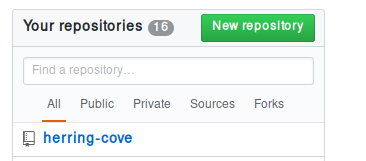
To do this you need to open your project’s repository, which can be done by navigating to the Your repositories section of the GitHub homepage.

In the bar you need to select Settings.

And change the Source setting from the GitHub Pages section to Master.

Setting up GitKraken
While using a Git Client is not strictly necessary, it does provide a certain level of convenience. Of course you can use the GitHub web interface or the command line Git service, but that is not necessarily required when there is a simple client that can do this for you.
I use GitKraken, as it is a cross-platform client, that has a simple and intuitive interface. You can download GitKraken here.
Upon installation, GitKraken will prompt you to link your account to GitHub.
Once you have linked your account, you can clone your fork of the Herring-Cove to your computer. By cloning, you are essentially creating a local copy of the project.
You do this by either:
File-->Clone RepoCTRL + N
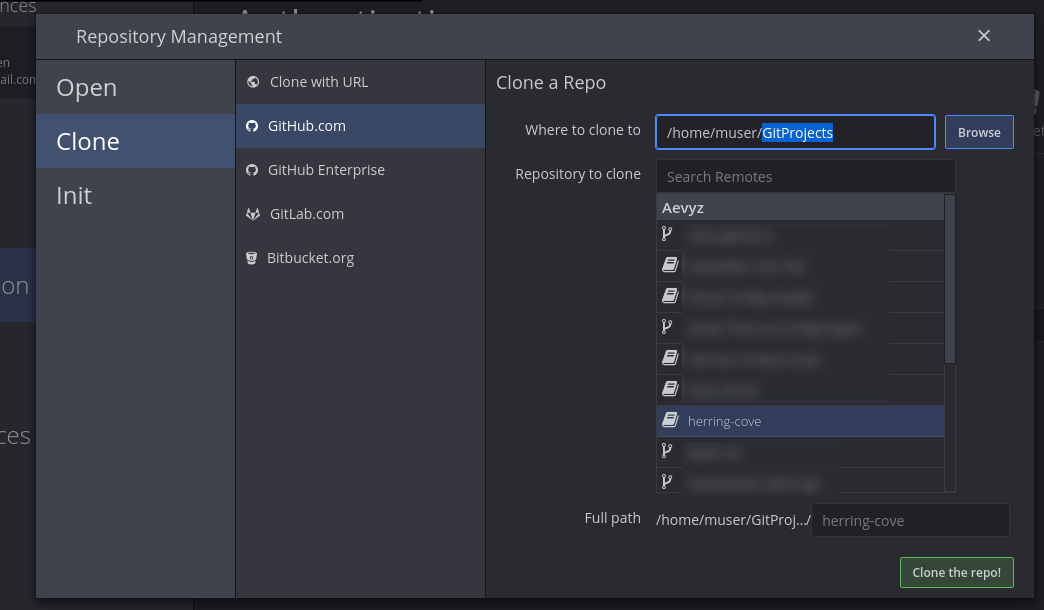
In the popup, you can first of all choose from where you shall clone your fork. In our case, this shall be from GitHub.com (Not Enterprise).
Following that, you can select the folder to which you shall clone the fork. Any folder shall do for this step, but it should be placed in a sensible place.
Select the herring-cove repository to clone and finally hit the Clone the Repo! button to begin the cloning progress.

Once the project is successfully cloned, you can now open the project using the Open Menu (File-->Open Repo or simply CTRL+O) and selecting the project from the file menu.
Setting up Atom
The reason why I prefer using Atom is that it supports projects. This makes is superior to Notepad++ in my opinion, as you can for instance perform Find and Replace operations on multiple files. A further benefit is that it contains a Markdown Preview, which shall be useful when writing your blog posts.
To configure Atom for your project, you simply need to add it as a project folder. This can be done either via File-->Add Project Folder or the shortcut CTRL+SHIFT+A.
And that’s it!
You finished configuring the project.
You can now view your site at https://<Your User Name>.github.io/herring-cove
In the event you have renamed your repository to something else, replace
herring-covewith the repositories name
 The content of this site's posts are licensed under a Creative Commons Attribution-NonCommercial 4.0 International License. Read More