Whilst WebStorm is a powerful IDE focused on websites with Javascript, it does not directly support Jekyll, however using certain plugins, it is able to perform a lot of functions that make creating Jekyll sites far easier, such as integrated Git to allow for easier uploading to GitHub sites.
Note however that WebStorm is not free for the general public, however offers discounts or complimentary licences to certain groups, including university students and open source contributors.
As this is slightly longer than my regular post, I shall be using a table of contents to help formatting.
- Cloning a Project in WebStorm
- Installing the Markdown Plugin
- Creating a Template
- Testing Your Site
- Pushing Commits
- Refrences and Further Reading Material
Cloning a Project in WebStorm
Simply Navigate to VCS > Checkout from Version Control > GitHub. There you shall be prompted to generate a connection to your GitHub account, assuming you haven’t already once logged into the system before.
A popup shall appear, asking which repository you wish to clone and where it should be cloned to.

With that, your project should have opened in WebStorm.
Installing the Markdown Plugin
By default, WebStorm does not support Markdown. Therefore we need to get a plugin to do so. Navigate to File > Settings > Plugins > Browse Repositories.

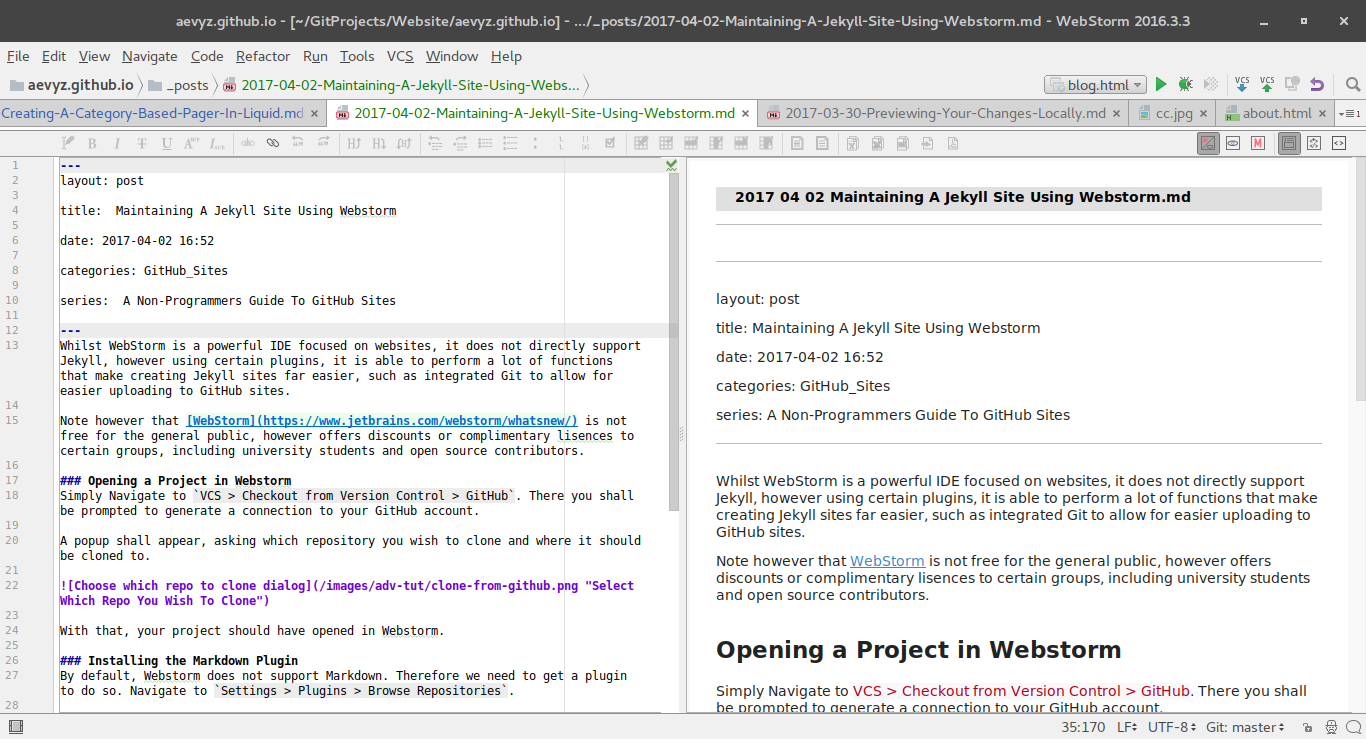
In the following window search for Markdown Navigator and install it.
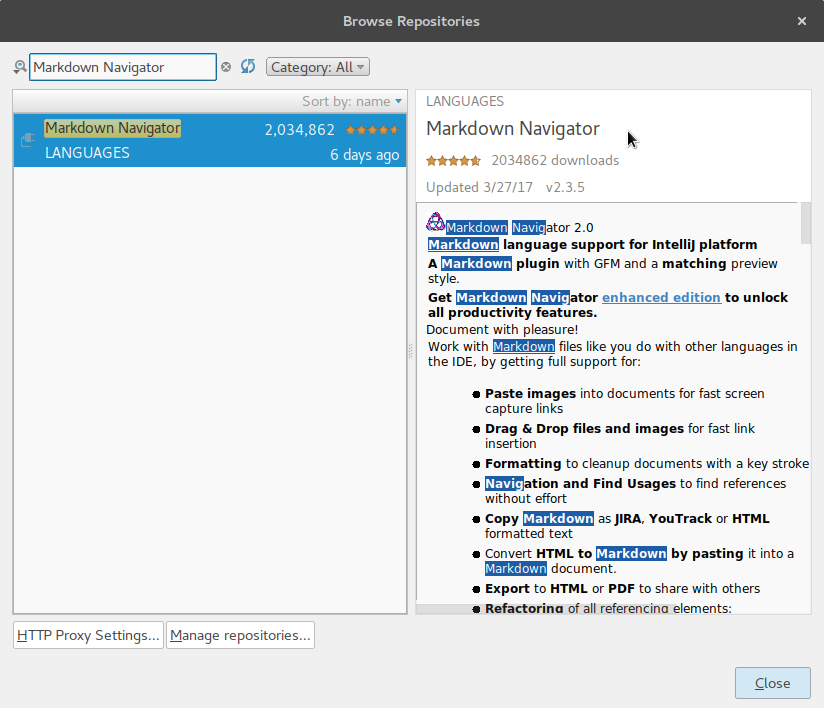
Once you’ve installed the plugin, you shall be prompted to restart WebStorm. Upon restart, you shall have a preview on the right hand side when typing out Markdown texts.
Creating a Template
Something that will speed up the writing of posts, is if you can automatically generate your front matter. This can be done in the form of templates.
You can edit templates by going to File > New > Edit File Templates
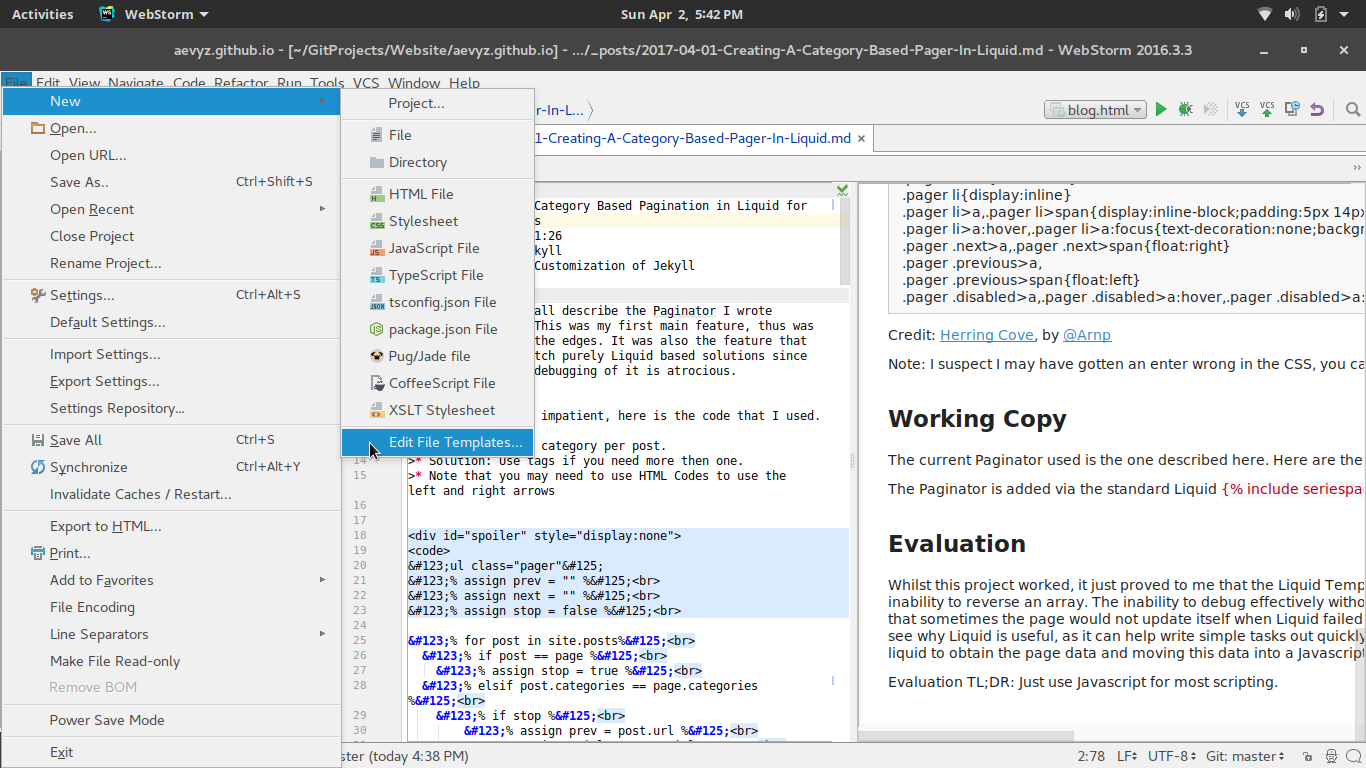
The following window shall appear. Simply hit the + button to add a new template.

Templates are written in Apache Velocity. While you can simply make a template that creates blank spaces for you to manually fill out, you can automatically fill out certain portions by implementing some code. Here you can find the user guide.

As seen in the image, I have been implementing my own code:
##
##-----------------------------------
## Remove dialog box from menu
##-----------------------------------
##
#set($foreach = "")
#set($word = "")
#set($nofileext[0] = "")
#set($rmspace[0] = "")
#set($rmspace[1] = "")
#set($rmspace[2] = "")
##
##-----------------------------------
## Actual Code Starts Here
##-----------------------------------
##
#set ($rmspace = $NAME.split("-"))
#set ($title="")
#foreach($word in $rmspace)
#if($foreach.count > 3)
#set ($title = "$title $word")
#end
#end
##
##-----------------------------------
##YAML
##-----------------------------------
##
---
layout: post

title: $title

date: $rmspace[0]-$rmspace[1]-$rmspace[2] ${HOUR}:${MINUTE}

categories: $category

series: Series Undefined

---
<!--  TODO: Define Series-->
This template shall generate the following popup:
This code automatically generates a title, assuming you name your document in the default format YYYY-MM-DD-TITLE-GOES-HERE (.md shall be appended automatically). Date shall also be taken front the title, but the time will be automatically gained via the $HOUR and $MINUTE. It should be noted that $YEAR, $MONTH and $DAY exist and can be used as well ($YEAR-$MONTH-$DAY). Here is a list of
As $category is defined nowhere, you are allowed to submit input. Unfortunately, I do not believe it is possible to implement a drop down box here, which would make life easier. Alternatively you can make multiple templates for different categories, but in my opinion, that is just unnecessary clutter.
In my case, I have a series tag (not included within Herring-Cove and most Jekyll templates), which is basically the full name of the category. Admittedly this is not the most efficient way of doing things and I am working on a Liquid script to improve this, but I thought that this would serve as a good demonstration.
This template will automatically generate a TODO which will notify you before you upload your site, that you need to improve something. Technically, you are supposed to define a custom TODO for YAML/Markdown, but I am lazy so I just used the HTML comment todo that is already inbuilt in WebStorm.
The undefined at the end is to make sure that something is visible, so that even if I forget to update the TODO, I will notice in the testing phase.
Reminder:
The Front Matter (the YAML header) of the Markdown post is not in the Markdown format, but in YAML, however the Markdown plugin reads the entire document as Markdown, thus formatting may look strange.
My personal tip would be to use double line breaks between each item in the header, so that Markdown thinks you are trying to continue writing on the next line. Furthermore, you should also add a line break before the closing---, as it prevents the formatting from messing up in the preview.
Testing Your Site
Personally I’d recommend running the local Jekyll server via a terminal prompt (explained here), you can also configure WebStorm to have an inbuilt button for this.
You wish to add jekyll serve --watch to the External Tools section of WebStorm, which can be found at File > Settings > Tools > External Tools.
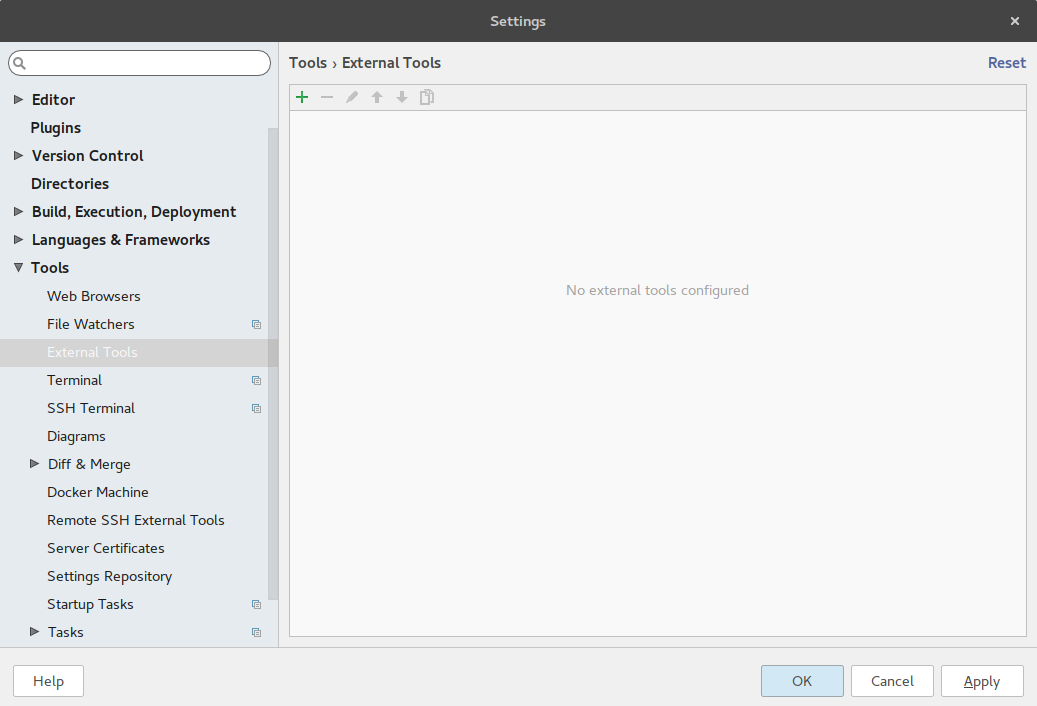
Once you are there, add a new tool via the + button.
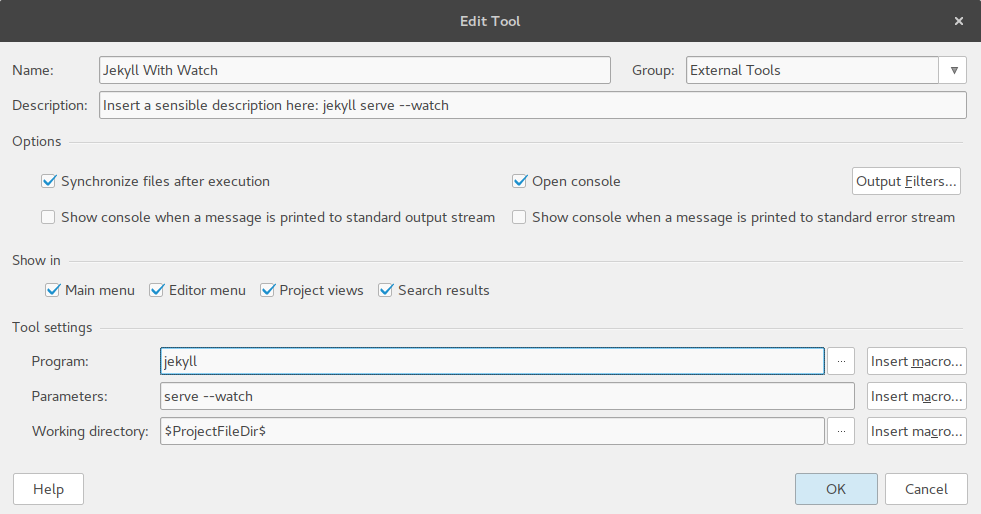
Under program list Jekyll and under parameters list serve plus any additional parameters, such as --watch. You can read more about this at the Jekyll Docs Page.

Once you have successfully added your external tool, you can launch it via Tools > External Tools > Your Tool Name.
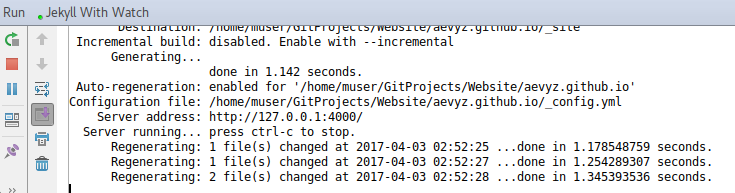
When you launch your external tool, you should have the same interface as when you use the Terminal Prompt. Important difference is that CTRL+C is copy and not quit, thus meaning you have to use the red stop button in WebStorm for that.
Pushing Commits
Once you have tested out your changes and are happy to push them onto the web. You can use the Commit Changes menu, found in VCS > Commit Changes or by pressing CTRL+K.
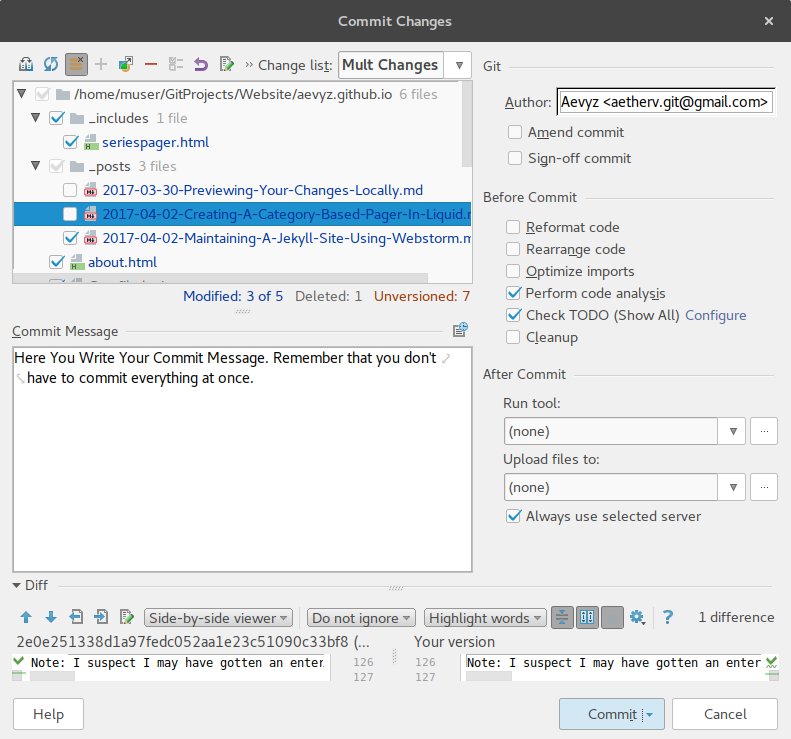
Select the files that you wish to commit. Remember that not all files need to be committed at once. Select the files that you wish to commit. Remember that not all files need to be committed at once.
When commiting it is advisable to have a sensible comment. This helps people, including you, understand what each commit does, which is especially useful for when you need to revert a mistake.
Having an author is required for GitHub contributions, if you wish to count those.
Finally when you are ready to commit, simply click Commit > Commit and Push. In the following windows, simply hit push.
At this point there may be some warnings that may pop up. Not all of these may apply to you, especially since you have YAML headers on some pages, which may confuse the IDE. You can have the IDE ignore these by going to the relevant errors and using the SHIFT+ENTER menu ignoring them. These are unfortunately things that need to be decided on a case by case basis, if you need some help, feel free to leave a comment, I will get back to you.
Hint:
If you feel like you are missing assets, check if you allowed the file to be pushed. If in the file browser the file name is in red/brown, it means that the file needs to be authorized to upload. This can be done byRight Click on File > Git > AddorCTRL+SHIFT+A. Alternatively you can check the files in theUnversioned Filessection of theCommit Changesmenu.
A more in depth guide can be found on the official WebStorm documentation.
References and Further Reading
- Cloning
- Installing Markdown Plugins
- Markdown Navigator
- Markdown Support, apparently has less features
- Creating a Template
- External Tools
- Commits
- Todo
 The content of this site's posts are licensed under a Creative Commons Attribution-NonCommercial 4.0 International License. Read More