It would be ideal to preview your changes before pushing them to the site, to see if the formatting matches your expectations. Especially if you are experimenting with Liquid or Javascript, you may find that sometimes the text does not match what you expected. Obviously uploading tests directly to GitHub is the simplest solution, as it directly builds content for you when you upload your content, but this is not the best idea for a multitude of reasons.
Why Not To Test Directly On GitHub?
1) Poor End User Experience
By uploading testing content, you are allowing your end users to see content that is not yet finished, which may negatively impact viewing experience. Let’s say that you are rewriting the navigational bar. Whilst you are rewriting the bar, you may accidentally break it, and prevent the module from displaying the correct content. Sure you can revert this using git, but you will wind up negatively impacting a user who is attempting to load your site.
2) Saves Coding Efforts
Hypothetically you could rewrite your site to show only content that has a published: true tag on it, however this would require you to reprogram multiple sections of your site, such as post lists and pagers. Furthermore, coding these functions are likely to create bugs in your code, which will only take up more and more time, especially considering that Liquid is a hard language to debug. This effort could be saved by simply testing locally.
3) Unclear Git Commit History
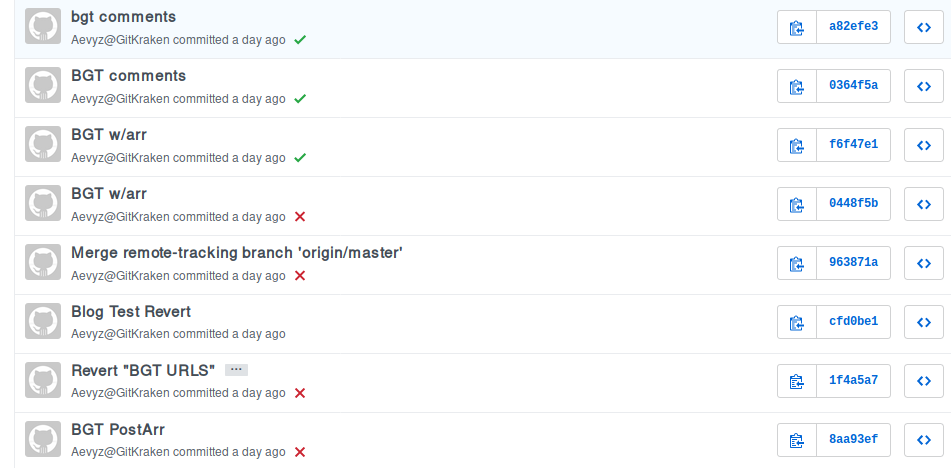
Testing online, means you have to upload your posts to GitHub via commits. This will easily clutter your commit history, making navigating it a terrible idea. Also if you are like me and often does not name things correctly when uploading, your history is likely going to end up like this:

4) Time
Uploading your content means that you are going have to spend time first uploading your commit to GitHub servers. Furthermore you are going to have to wait until GitHub builds your site and then updates itself. This process can take up to 30 seconds per change. While this does not sound like much, if you are trying to learn to use GitHub sites via trial and error, like most of us do, you are going to notice that this process stacks up quite easily. Locally, most changes build in seconds.
I am fairly sure that there are far more reasons, but these should be enough to demonstrate why this is a bad idea. Whilst I shall admit, that I started off pushing all my tests to GitHub, I soon realized how terrible the idea is. Don’t repeat my mistakes, please…
The Better Solution: Testing Locally
Installing Jekyll
In order to test your site, you will be required to install Jekyll, so that you can build your site locally.
Windows Installation of Jekyll
Officially Windows is not supported by Jekyll, but there are ways of installing Ruby regardless. For anyone using Windows 10 with the Anniversary Update, they can use the Bash on Ubuntu on Windows feature, to install Jekyll via apt (see Linux instructions).
For the other Windows variants, follow this guide or read the documentation page.
Linux and OSx Installation of Jekyll Prerequisites:
- Ruby version 2.0 or higher
- RubyGems
- GCC (check if installed by running
gcc -vin your systems command line interface) - Make (check by running
make -vin your systems command line interface)
Open a Terminal Prompt of your choice and simply type in
gem install jekyll
For more information, simply read the documentation on the Jekyll website.
Running Your Site
Simply open a Terminal Prompt and change the directory to your Website, aka your GitHub project folder. You can change directory by using the cd <File Path> command. An example of this would be cd GitProjects/Website/herring-cove.
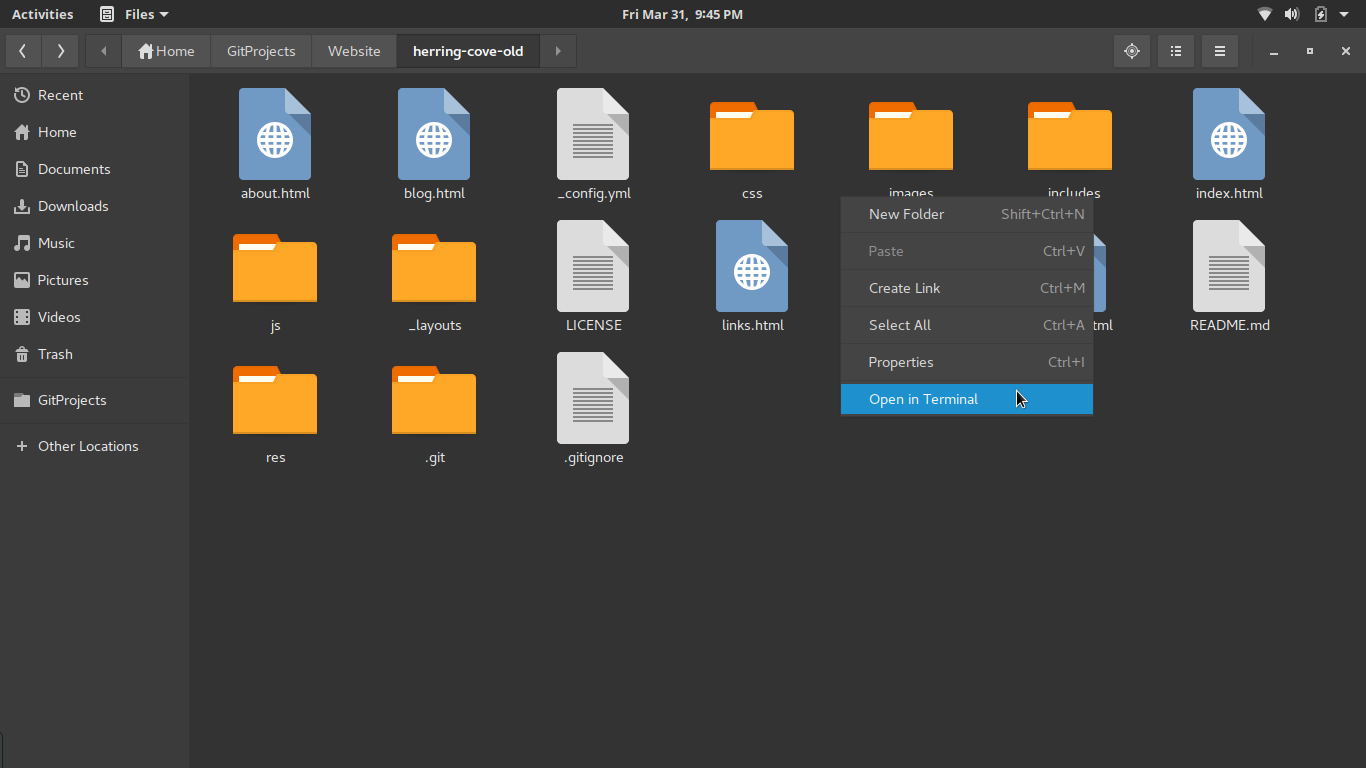
Some operating systems/file browsers allow you to open a Terminal Prompt at a given folder.

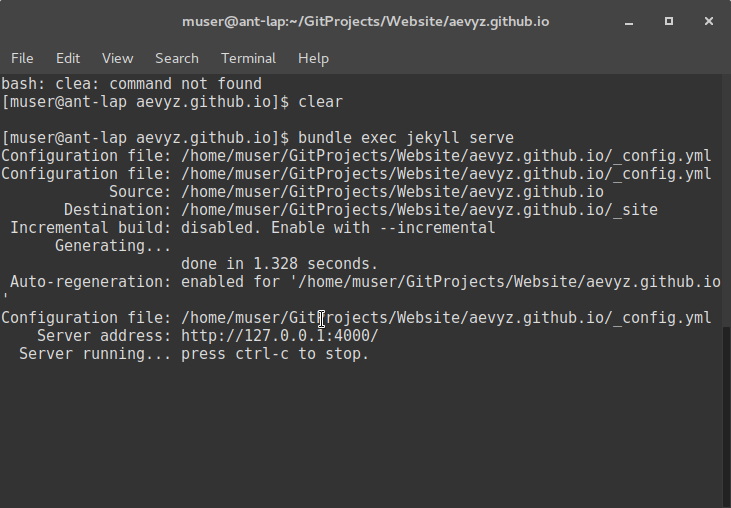
When you have opened the directory in your Terminal Prompt, simply type in bundle exec jekyll serve and wait for your site to be built. Your folder should look like this:

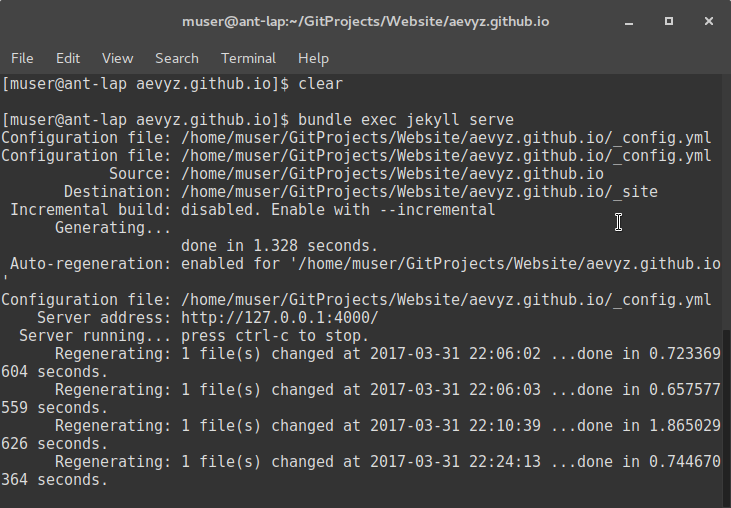
Whilst the server is running, you can access your site at localhost:4000 or 127.0.0.1:4000. Now if you make any changes, they shall be automatically updated. The Terminal Prompt shall also give you information on any build fails that it encounters, which can help you alleviate the issue. To stop the server, simply press CTRL+C.

 The content of this site's posts are licensed under a Creative Commons Attribution-NonCommercial 4.0 International License. Read More