Now that you have created content for your website, you want to publish it live on your website. This is done by creating a Commit, that you can Push on to your site.
Creating a Commit
Now assuming you have any changes you wish to publish, such as any new posts or some new site feature, you can make use of GitKraken to help you upload these to GitHub. You can bundle these changes (or simply a single change) into a so called commit, that you can then upload to the GitHub servers.
The first step, is to select the item which has a text bar containing the words //WIP.

Now a bar on the right appears, which details the changes you have made, prompting you to stage the changes made. In simplified terms, do you wish to make the changes listed here.

Note: If no changes have come up, you likely have forgotten to save your files in Atom.
You can either stage files individually by hovering over them and pressing the Stage File button, or you can simply press the Stage all changes button and automatically stage them all.

From the files that you have staged, you can create a commit. It is a sensible idea to give them an appropriate name and description, as this will make your life a lot easier in the event you need to revert changes to your site. When you are ready you can simply hit the commit button.

Finally you can upload your posts to the GitHub servers by simply hitting the Push button in the top bar.

Check if Project Has Any Build Errors
In the event that you have made a big mistake in your code and the site cannot be built, don’t panic, the old functional version of your site will still be shown.
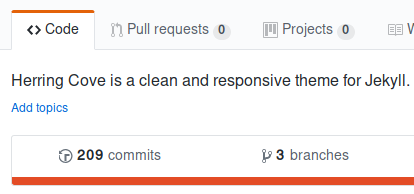
You can check if your new content has any major flaws by going to your online repository, found at www.github.com/<Your User Name Here>/herring-cove.
Now simply click on the commits button in the code tab.
In the event there is a green check on your commit, then that means that everything is okay. If not, you may have an error message that pops up, such as this one that may help you resolve the issue. Be aware, that this does not always happen.

In some cases, GitHub might not interpret there being any changes to the site, despite there actually being so. Examples of this, are for instance when you make changes to the CSS (if you aren’t sure what this is, it will be explained later). To alleviate this, you must force GitHub to rebuild your site. The easiest way to do this, is to make a slight change to a post of your choice, such as adding another enter at the end of the page, which won’t make any difference. Whilst this is not the ideal solution, it forces GitHub to rebuild your site. Alternatively, you could use this as an opportunity to spell check your site, which might be useful as well.
Viewing in you Browser
Despite there being no build errors and you having previewed your site before uploading, there may be formatting errors that may have slid past you or problems with GitHub interpreting your site differently. It is better to be safe then sorry, so just view the pages you created just as any end-user would.
Your default URL for your website is
https://<Your User Name>.github.io/herring-cove.
 The content of this site's posts are licensed under a Creative Commons Attribution-NonCommercial 4.0 International License. Read More